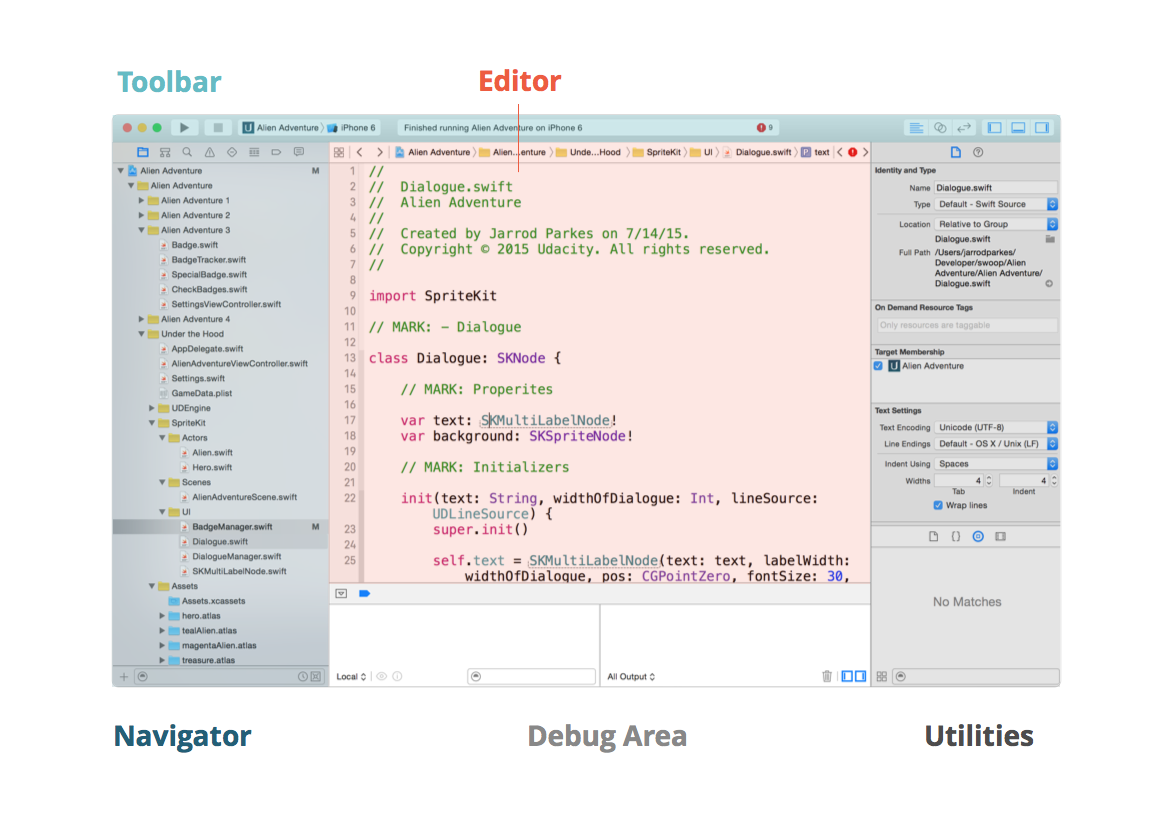
If you open an Xcode project, we can see that Xcode is divided into five main sections: the Navigator on the left, the Editor area in the middle of the screen, the Debug area at the bottom, the Utilities on the right, and the toolbar at the top.
Xcode 的介面可以分成五個區塊,左邊是 Navigator,中間是編輯的區塊,下面是用來 debug,右邊是 utilities,toolbar 在上面。
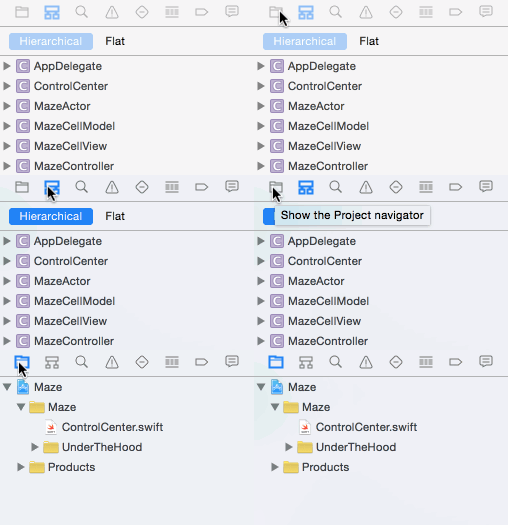
The Navigator allows us to examine the different parts of our Xcode project. Currently, the Navigator displays the Project navigator. The Project navigator lets you see all files contained in a project. If you cannot see the Project navigator, make sure you have the Project navigator selected using the icons at the top of the Navigator (it's the file icon on the far left).The Navigator gives us many options for viewing a project.
左邊 Navigator 這一區就可以看到 project 裡面所有的檔案,呈現的方式有很多種。 如果沒看到 Navigator ,可以從選單的 view/navigator 去設定。
By using a keyboard shortcut (a special combination of keys), you can select the Project navigator. The keyboard shortcut to select the Project navigator is the Command key and the 1 key at the same time. It is abbreviated as ⌘1, ⌘+1, or Command+1 (they all mean the same thing). Also, if you click View in the top toolbar, and then go to Navigators, you can see the shortcut information listed for the Project navigator.
我們可以用 Command 加上 1,Command 加上 2,這些快捷鍵去切換 Navigator,會縮寫成 ⌘1、 ⌘+1、 或 Command+1,請試著操作看看。
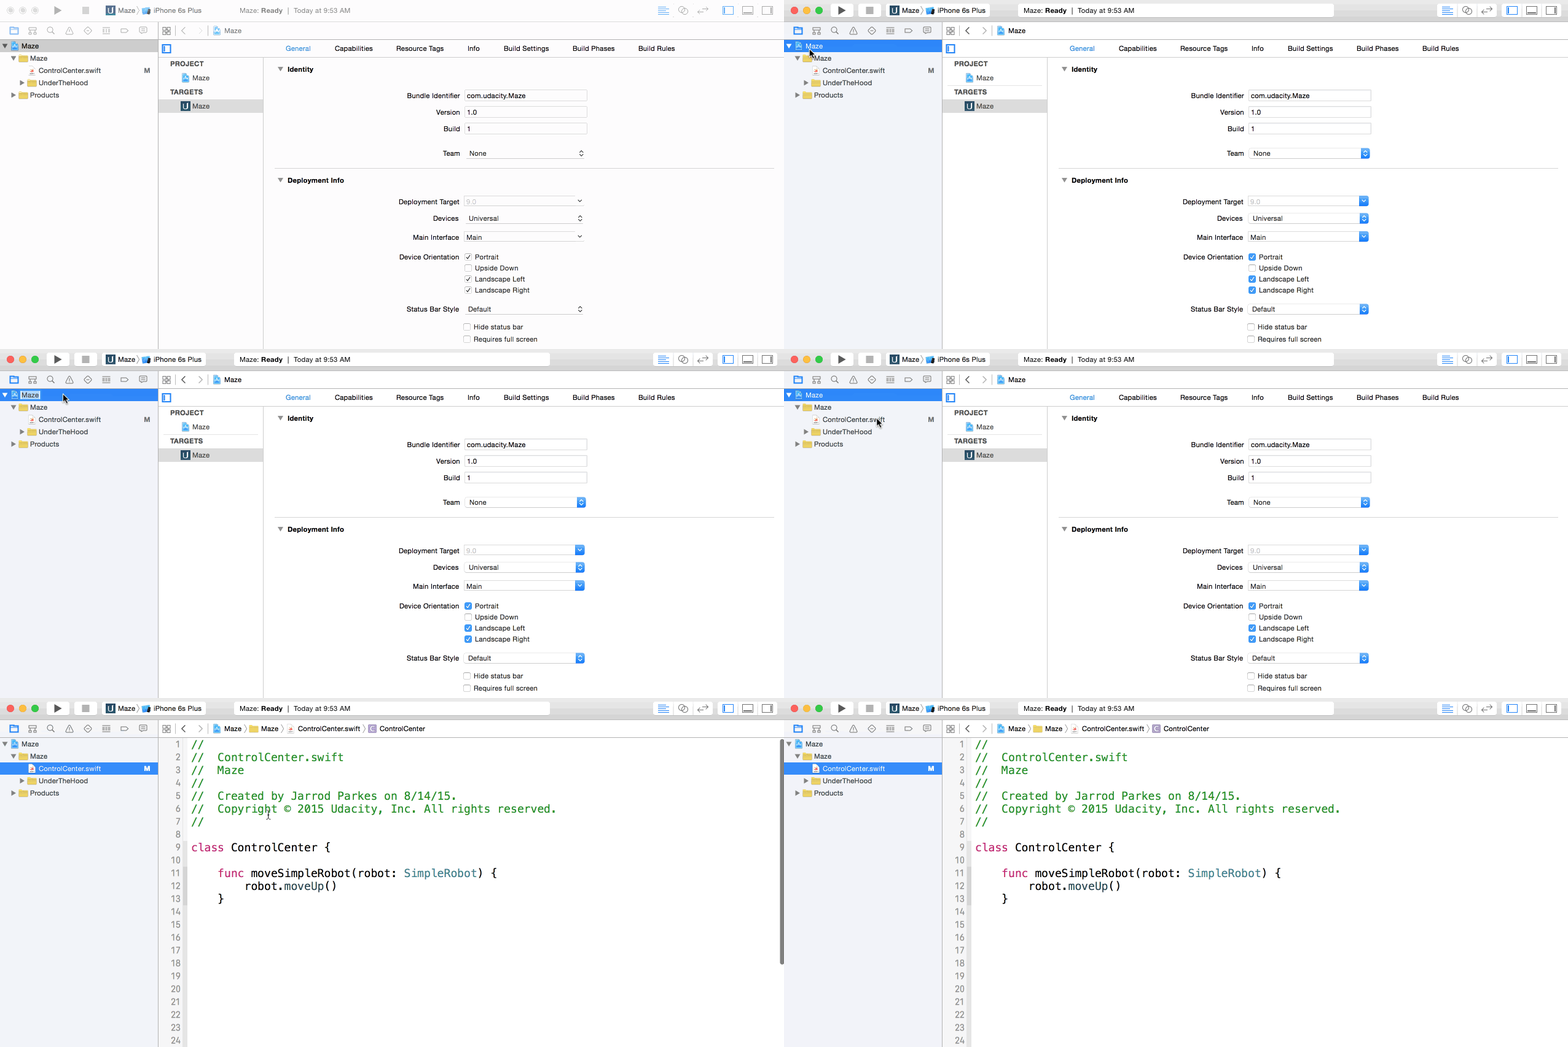
With Project navigator selected, click the project name at the top to view the project's settings.

Once selected, the Editor area displays project settings. This view gives us the ability to change settings such as our app's supported devices, orientations, and operating systems. For instance, you could specify that this project should only run on iPhones with the latest version of iOS 9, and the only supported orientation is Portrait. The current settings should be fine for now, but take a minute to read through them in Xcode.
現在我們先點下 navigator 最左邊的 icon ,然後點最上面的 Maze(我們的專案名稱),點下去之後中間的區塊就會顯示這個專案的 setting,我們可以修改 app 是否支援 iPhone 也支援 iPad、device orientations和 operating system,例如我們可以限制 app 只在 iPhone 上運行且要是 iOS 10 版本,然後畫面只能是 portrait 的,不能翻轉螢幕。
Now let’s take a closer look at one of the files in the project: ControlCenter.swift. To view this file, you may need to expand the project details by clicking the arrow to the left of the project name.
When you click on ControlCenter.swift, you’ll see the Editor area changes once again.
現在我們從 Maze 這個資料夾打開
ControlCenter.swift這個檔案。
The Editor Area now shows the contents of ControlCenter.swift. This is actual Swift code.
Now, the purpose of this app is for you to guide a robot through a maze. The Swift code in this file acts like the brains of the robot: it controls where and when the robot moves. We'll get to writing some code in a minute, but for now, let's keep exploring Xcode.
中間編輯的區塊就會出現 ControlCenter.swift 裡的 swift code。這個 app 主要是讓一個機器人走出迷宮,swift code 就像機器人的大腦,控制他何時要動跟要怎麼動,之後我們會增加一些程式碼。
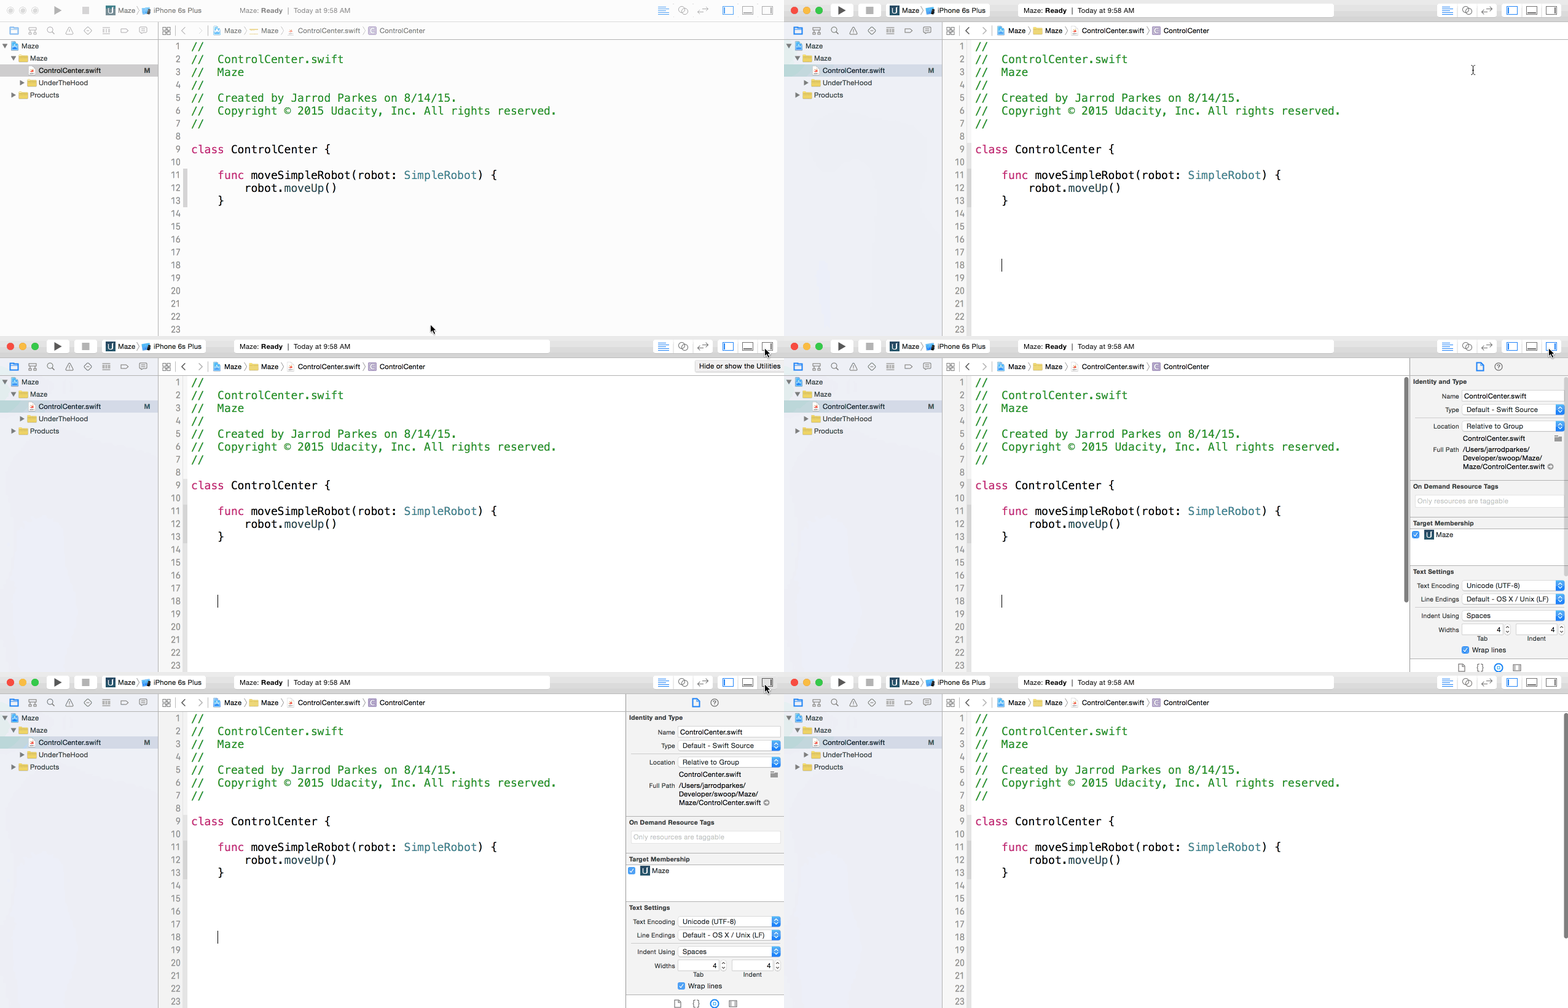
Next, let's look at the Utilities. This area’s primary purpose is to allow you to view, access, and adjust various options based on what's currently shown in the editor.The Utilities slide in from the right-side of the screen.
In the above example, the Utilities currently shows options for the ControlCenter.swift file, since that's what was most recently selected. Here we can see where the file is stored on our computer or even change the file name, but we won’t touch any of these options for now.
接著我們從最右邊的按鈕將 utilities 這一部分的設定拉出來,拉出來之後會秀出很多選項,這些選項是針對 ControlCenter.swift 這個檔案的設定,我們可以知道這個檔案現在的存在電腦的哪個資料夾。

If you are having trouble seeing any of the sections, then use the three buttons in the top-right corner of Xcode to show and hide the areas. The first button shows and hides the Navigator, the second button shows and hides the Debug Area (which we will talk about more in a bit), and the last button shows and hides the Utilities.
Take a minute to do the following:
Toggle the show/hide button for the Navigator. Toggle the show/hide button for the Debug Area. Toggle the show/hide button for the Utilities.
We will end our brief tour of Xcode here. To learn more about the ins and outs of Xcode, you can search the Xcode Documentation by clicking Help → Xcode Overview. The resulting page covers what we've talked about in much more detail and is a great resource for getting started.
如果你看不到這幾個區塊,你可以用右上角的三個按鈕去顯示或隱藏這些區塊,第一個按鈕可以控制 navigator,第二個按鈕是 debug 區塊(之後會講到),第三個按鈕是 utilities,你可以自己去按按看。關於 Xcode 的簡介我們先講到這裡,更多資料可以看 Xcode Overview,現在製作這份筆記的時間點是 2017年6月底,現在頁面上是 Xcode 9 的介紹。
另外這一篇文章有關於 Xcode 介面的詳細介紹,也可以參考。


